How To Draw Block Letters Step By
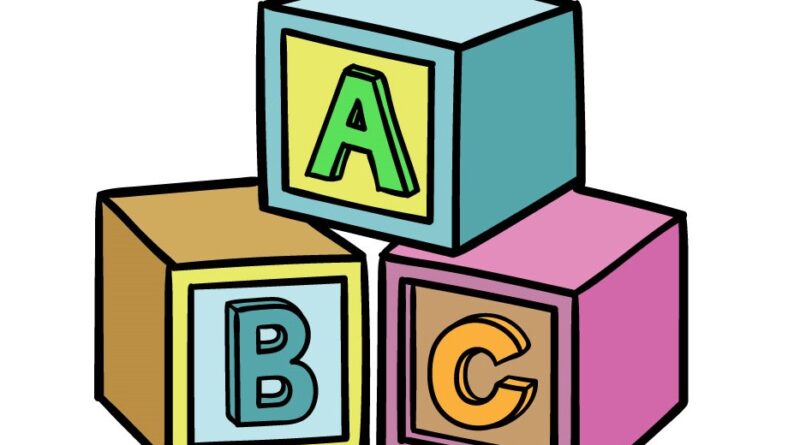
How To Draw Block Letters. Blocked letters played an essential role in many of our formative years! These bright and bold cubes with letters on them are a beneficial tool for young children to use as they begin to learn their alphabet and letters. Although physical blocks can be a great tool, it can also be fun and educational to learn how to draw block letters.
Sometimes it can be more complicated than expected; making a guide on how to do that is very helpful! This step-by-step guide on drawing block letters will show you how to learn and have fun mastering this drawing in no time! You can draw many more characters like draw a bird, Anubis drawing, cat drawing, cobra drawing, blueberry drawing, coconut drawing and many more drawing for kids.
Step 1:
For this guide on drawing block letters, you will find it much easier if you have a ruler handy to help you! We’ll be drawing three cubes on top of each other in this guide, and we’ll start with the outlines of these cubes in this first step. Drawing cubes, especially at an angle, can be trickier than drawing simple squares, so you’ll want to follow the reference image as you draw, as the angles will need to be quite specific. Using a ruler, you may want to measure the length of each line so that the cubes are the same size. There will be a few spaces left in the center of the stack of cubes, and we will fill them shortly.
Step 2:
Now that you have blocked out the outlines of the cubes in your letter design, you can start drawing some internal details. In this step, we will draw some of the edges of the two cubes at the bottom of the stack. Using this ruler, carefully draw the vertical and horizontal lines to form the sides and tops of the cubes. Again, the reference image will show you how to place these lines for the 3D effect.
Step 3:
For this third step of our guide on drawing capital letters, we will finish the edges of the top cube. You will do this the same way you created the first two cubes. Use your ruler again to finish the edges of the top cube. Then you’re ready to start adding the letters!
Step 4:
This block letter drawing wouldn’t be complete without a few letters, so let’s add the first one now! First, use your ruler to draw a square shape inside the side of the top cube facing us. Next, draw a bold letter A inside that square, then finish with some line detail on the side to give it a 3D effect.
Step 5:
In this fifth step of our guide on drawing block letters, we will replicate what you did in the previous step, just with a different letter. As before, you can use your ruler to draw a square in the lower left cube. Then draw a block letter B and add similar lines for that 3D effect. Once you’ve drawn that letter, we have one more to do in the next step!
Step 6:
In the next step, we’ll add some fabulous bright colors to your capital letter design, but we’ll end up with the final letter. You have mastered this now and must draw another square with a 3D letter C on the final cube. That’ll do the details for this block letter design, but before you continue, you might as well add a few details and additions of your own! You can change the letters on the cubes or even add a few more to the other sides of the cubes. You can also take what you’ve learned here and draw more cubes to spell your name! What else can you think to complete this drawing before the final step!?
Step 7:
In this final step of our guide on how to draw capital letters, we’ll bring the image to life with unique colors! Capital letters are usually bright and bold, so this is an excellent opportunity to use your favorite bright colors to bring this image to life. In our example, we’re only showing you one way to color this drawing, but this is a step where you can take control and show us which colors you think would look best in this image. You can also have fun playing with your favorite art mediums! An idea like this would glimpse great with colorful mediums like acrylic paints, shaded pens, or features. It would look just as good with more subtle mids, so it’s up to you! We can’t wait to see what colors and mediums you choose to finish this fa.